Start a Kitchen Windowsill Herb Garden: A Simple Weekday Routine for Fresh Flavors
Fresh herbs add brightness to home cooking and are unusually easy to grow in a sunny kitchen. This guide walks you through a clear step-by-step setup, a short repeatable weekday routine, and helpful variations and troubleshooting tips so your little garden thrives.
Step-by-step setup
Follow these steps to get a functional windowsill herb garden in about an hour. After setup, maintain it with a 3–5 minute daily check and a short weekly care session.
-
Choose the spot and light
Pick a windowsill that gets at least 4–6 hours of bright, indirect sunlight. South- or west-facing windows are ideal in many climates. If light is limited, select shade-tolerant herbs such as mint or parsley.
-
Select containers
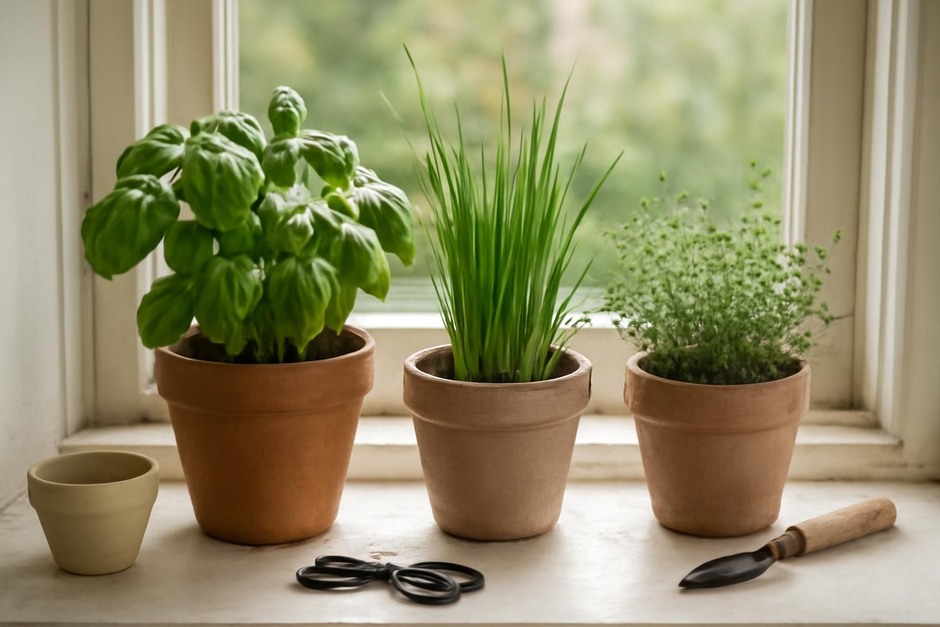
Use pots with drainage holes to avoid waterlogging. Small terracotta pots, ceramic planters with saucers, or a long rectangular trough work well. Aim for 8–12 cm (3–5 inches) diameter for single herbs or a 30–40 cm (12–16 inches) trough for several plants.
-
Pick herbs
For beginners, start with 3–4 easy herbs: basil, chives, parsley, and thyme. Mint is vigorous—grow it alone in its own pot. Choose young transplants from a nursery rather than seeds if you want instant results; seeds are fine if you enjoy watching germination.
-
Prepare soil and plant
Use a light, well-draining potting mix (not heavy garden soil). Fill pots, set plants at the same depth they were in their nursery containers, and pack soil gently. Water thoroughly until water drains from the hole, then let excess drain away.
-
Position and label
Place pots on the chosen windowsill, rotating them occasionally so all sides receive light. Label each pot with the herb name so you remember which is which—use simple stakes or tape.
-
Starter feeding
Wait two weeks after planting, then feed lightly with a diluted balanced fertilizer or use a slow-release pellet if desired. Most herbs prefer modest feeding; too much fertilizer can reduce flavor intensity.
Short weekday routine (3–5 minutes)
- Morning check: Look for wilting, yellowing, or pests. Gently touch the soil—water only if the top 2 cm (about 1 inch) is dry.
- Quick harvest: Snip a few leaves for cooking. Harvest from the outside and never remove more than one-third of a plant at once.
- Rotate pots: Turn each pot a quarter turn every few days so plants grow evenly toward the light.
Once a week, do a deeper check: water thoroughly if needed, trim legginess, and remove dead leaves. Every few months consider repotting if roots start to crowd the pot.
Variations
-
Container ideas:
Use recycled teacups for single stems, a wooden herb box for a rustic look, or a hanging pocket planter if sill space is limited. Ensure drainage in any container.
-
Herb combinations:
Try Mediterranean mixes (rosemary, thyme, oregano), Italian basics (basil, parsley, chives), or a tea mix (lemon balm, mint, chamomile). Keep mint separate—its roots spread fast.
-
Seed vs. transplant:
Seeds are cost-effective and rewarding; start indoors 6–8 weeks before you want plants. Transplants give an immediate harvest-ready option for busy cooks.
-
Microgreens and cut-and-come-again:
For very fast results, grow microgreens in a shallow tray. Many herbs (basil, cilantro) also do well with a cut-and-come-again approach—trim regularly to encourage bushy growth.
Troubleshooting
-
Yellow leaves:
Often a sign of overwatering or poor drainage. Let soil dry slightly, reduce watering frequency, and ensure excess water can escape. Replace waterlogged soil if necessary.
-
Leggy, spindly growth:
Usually caused by insufficient light. Move plants to a brighter window, prune back long stems to encourage bushier growth, or supplement with a small grow light for short winter days.
-
Pest problems (aphids, whiteflies):
Wipe leaves with a damp cloth or a mild soap solution, isolate affected plants, and remove heavily infested leaves. Healthy plants recover faster than stressed ones.
-
Rootbound pots:
Roots circling the pot indicate it’s time to repot into a slightly larger container. Gently tease roots before planting into fresh soil to encourage outward growth.
-
Flavor loss:
Over-fertilizing or letting plants flower can reduce potency. Harvest regularly, pinch flower buds to extend leaf production, and use light feeding.
With a simple setup and a short daily routine, a kitchen windowsill herb garden becomes a reliable source of fresh flavor and small gardening pleasure. Start small, keep care consistent, and enjoy the simple ritual of snipping herbs to finish meals.